Naked Trailer Photos
 Like a bad striptease, it all came off this weekend.
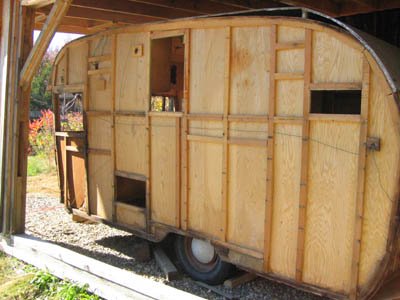
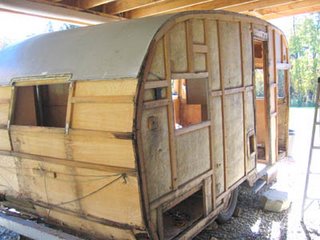
And surprisingly, what was underneath wasn't as scary as we thought.
Sure, there were some bumps and wrinkles, (and some saggy bits), but like many dicey situations, leaving things to the imagination was worse than the reality, and at least now we know who we've brought home.
Ahem.
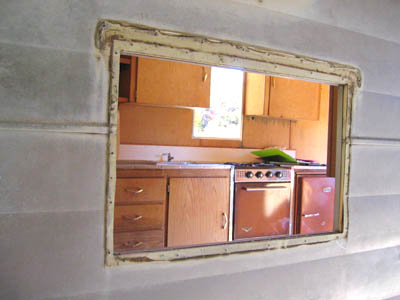
 When last we left, we had taken off most of the exterior screws and some of the windows and trim in preparation for removing the skin. This weekend we finished pulling all trim, windows, and appliances.
The appliances are on their way to a propane company for a good cleaning and a safety check.
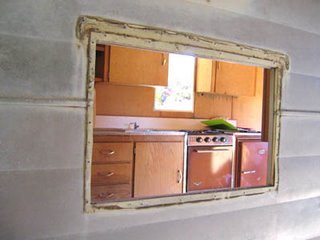
Interestingly, we realized that the stove and refrigerator are too big to fit through the door, so we had to take off the rotting front corner panel to get them out. Clearly, they were on the deck before the walls were raised during original construction. We will have to have them back before we can begin the reframing in the front.

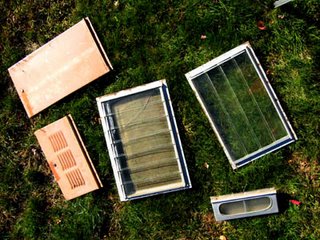
As we were pulling everything off we laid it on the grass so we could label the parts for reassembly. Luckily it was a totally gorgeous fall weekend with very little wind which really helped us get the aluminium off smoothly.
All parts will be stored on shelving in an adjacent storage area for safekeeping.
I have to say, this has been really fun, kind of like working a puzzle. There is no rocket science here, just nuts and bolts, step by step, taking it one piece at a time.
And now I will let you in on a little secret.
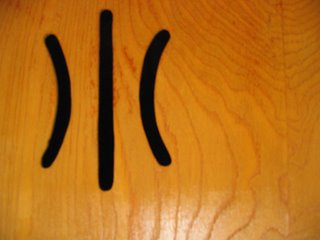
Here is the most useful tool you will ever find if you have to remove aluminum from a vintage trailer.
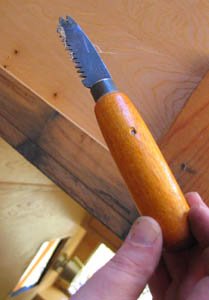 It is an upholstery tack and staple remover, and it is worth its weight in gold when it comes to pulling rusty flat headed nails out of old aluminum.
It looks a little bit like a clam knife, (for those of you who have ever shucked oysters), and the curved/tapered tip allows you to get under the head of the nail and lift it, and then the serations on the side allow you to pull the nail out with a flick of a wrist. This and a hammer were all we needed to completely unskin the trailer.
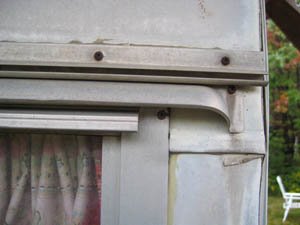
On this trailer the skin was applied in panels with the side tops first, followed by the side bottoms, and then the roof, which rolls over the sides, followed by the front and back, top to bottom (which also roll over the sides). So we took it off in reverse order, from bottom to top, front/back and then sides.
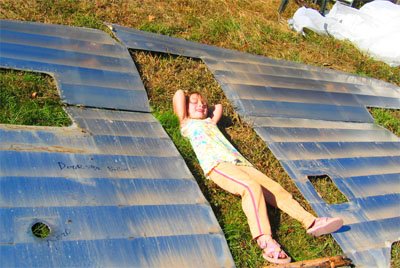
 We laid it on the ground wrong side up, and marked all openings, joints, and holes for future reference.
Unfortunately, I have been unable to find a source to replicate the 6" run pattern of the original siding, so it looks like I will be re-skinning the trailer with 4" run instead. The original skin has a few bad tears, and if I'm going to the trouble to completely tear down the trailer, I want it to look as good as possible when we finish, so new aluminum is preferable. I have seen restored Shastas with 4" siding and they look great.
 Although we took off all of the nails holding the roof on, there was no point in actually removing it. We will be reusing it, and it will keep its shape better if it just stays in place. We will still be able to get under there to re-wire and add insulation. The roof joins are "Pittsburg Joints" as opposed to the simple "S-Joints" which are used on the rest of the trailer, and are much easier to separate. I'm pretty sure they joined the roof panels together and then put the entire roof on in one piece during original assembly.
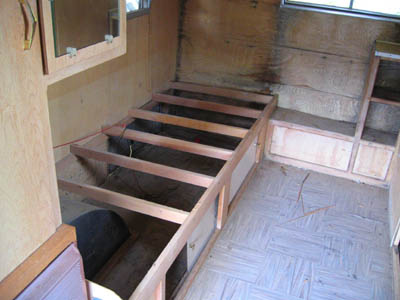
After taking off the skin, we cut away the (very meager) fiberglass insulation, so we could check out the wiring, framing, and veneer. We will replace the insulation with a much more robust closed cell insulation that will help both in terms of strength and in resistance to condensation, a major threat to these old trailers.
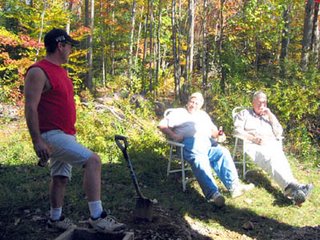 This weekend's activities brought out a full complement of family inspectors, helpers, and philosophers who took full advantage of the beautiful holiday weekend.
We'll see if they're still here come November.
Next time: Cutaway and framing.

Down and Dirty...Real Dirty
 Well, nothing brings you down to earth like a little dirt under your fingernails. And in your eyes. Your lungs. Your bra.
This weekend we finally got going on a little demo.
It took awhile, because life intervened, as it does. It was pretty exciting to finally lay hands on and take stuff apart. Before we lifted a screwdriver, I got out the camera, and began documenting all of the detail I knew would be tricky once we got the skin and the interior apart. I took meticulous notes, because if there's one thing I know about myself, it's that my memory will be about half as good as I think it is once this thing is lying in pieces in the barn.
Then we started at the front and began the disassembly. Unscrew. Unscrew.
Unscrew, unscrew, unscrew.
 This first weekend was pretty much a shakedown to figure out how fast we cold go, and to reverse engineer the trailer. The goals were to get as many screws out as possible, and to get as much loose hardware and secondary structures out of the inside in the front and back where the reconstruction will be happening. As we unscrewed things from the exterior, I marked the holes in the skin so that we would know what hole is what when the skin was off and in pieces. This will help if we need to use the old skin as a template for any replacement aluminum. Again, one hole will look like a thousand others once we pull the puzzle pieces apart.
 The most useful documentation on a teardown I've found is this great photo essay of a 1957 17' exterior restoration done by Craig McCormick on his website. Just like a house restoration, my plan is to strip off the skin, and repair the structure from the outside starting with the interior skin and working back out. While the skin is off we'll be upgrading the electrical and water systems, installing a new heat pump/AC combo unit, and beefing up the insulation. I know the platform is solid, and the floor is in good condition, even in the areas with water damage, so it will be all about the walls.
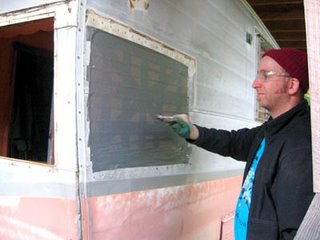
The whole skin will be coming off in the weeks to come, and my brother, who is a sheet metal contractor came by to look at the skin and help us figure out what will need to be replaced, and what can be repaired and straightened.
Here's a little list of what happened both outside and in:
Removed from Outside
- propane tanks
- front jalousie window assembly
- front side windows (one had to be smashed by hubby, see above)
- door and screen
- all specialty plates, lights and hardware
- dripcaps from all front windows and doors
- edge caps and channel molding that holds awning from both sides front and back
- about a bizillion little rusty screws

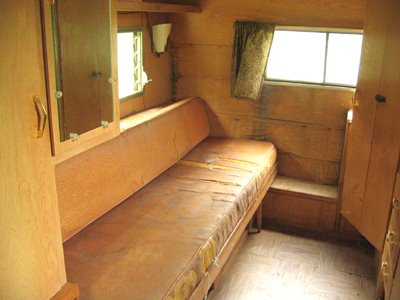
Removed from the Inside- front banquette seating
- all lighting
- rear couch
- all msc. hardware like curtain rods, etc.
- 40 years worth of dust and debris including: a woman's shoe circa 1965 (in the floor near the watertank) , a jar of grease from 1968, a mouse carcass, wire, rope, scary rusty cans, old rattan plate holders, rolls of dark brown paper towels that didn't start that way, alot of dirt.
I didn't have the heart to tackle the marine toilet, but that comes next.
I can hardly wait for that one.
Believe me.
But hey, it was fun.
Next time: More demo.


From Wichita, with love

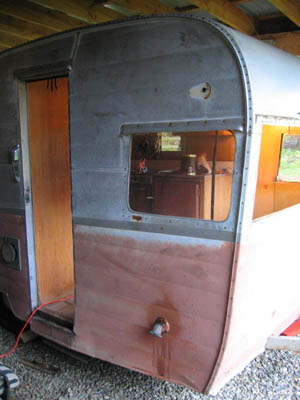
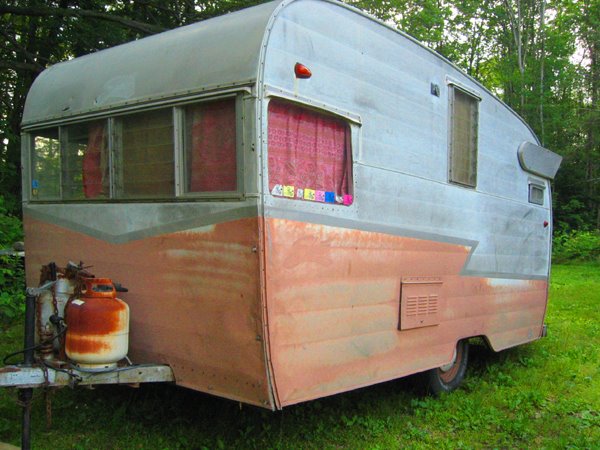
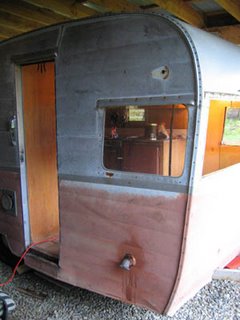
Well, the 16-SC is here.
Thanks to U-Ship, it made it the 1,600 miles from Wichita, KS in good shape (meaning it arrived in the same shape it left in; see below) and now it's a 2,500 lb salmon-y cinderblock in the yard.
Frankly, I'm equal parts scared and totally in love.
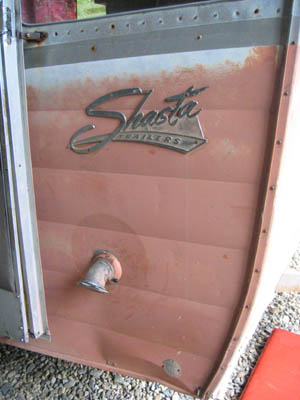
As promised, it is in original condition, with all of the fixtures, appliances and details, right down to the forty-two year old toilet. The only thing that's been replaced is the front left window over the banquet. This also means original scrapes, dings, dead flies, and flaking paint.
Of course, we said original, not mint.
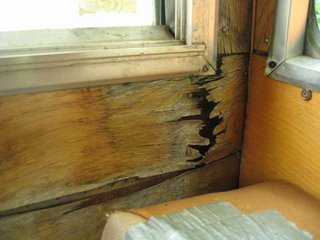
Check out this water damage in the corner.
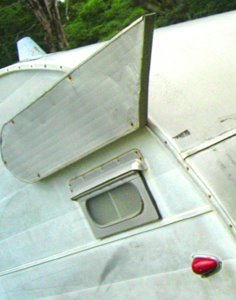
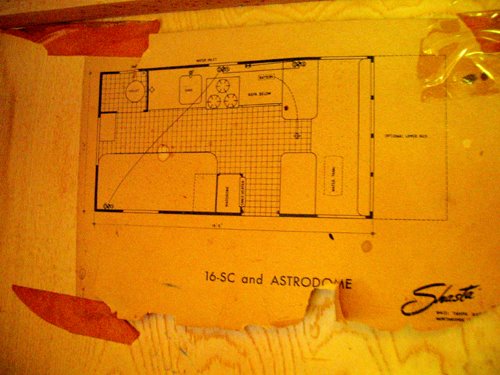
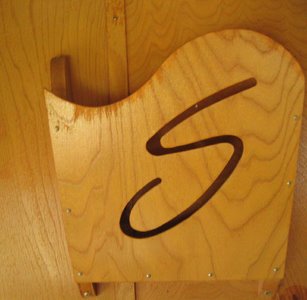
However, it does have many fetching qualities too, like the intact wings, the Shasta magazine rack, all the warm birch goodness, and the excellent 16-SC layout, with the couch on the side, which makes the cabin super spacious.


As I look at the pictures we took today, the trailer looks really decrepit, but the under-carriage is sound, and the RV dealer who looked at it before it left Kansas gave it a clean bill of health.
Next step: Secure a weatherproof space near Boston to begin the tear-down.
I'm expecting to have to remove the entire lower skin all the way around to get at the framing, so we can replace the inner skin and corner framing both front and back. This will also make it easier to bring the electrical system and propane up to date. Plans call for 30 amp/120 service, as well as an enhanced 12V system with a converter and a deep cycle battery.
It looks like we'll also have to totally replace the exterior aluminium skin on the left (door) side, where it got a bad tear over the door frame. This is okay, because we want to replace the original heater with a new heat-pump/AC unit, which will require a slightly different exterior opening than the original furnace. Once I get the skin off, I'll order new skin from All-Rite Aluminium. The pattern on these Shastas is called "6-inch run".
So, once we get into a space, we'll see what lurks. I'm pretty sure it's the makings of a B-horror film.
You know--the ones where you laugh and scream in equal measure.
Gory details to come. Like I said--scary love. Wish me luck.
Welcome to Trailer Pixie!
 Welcome to trailer pixie.
I launched this site to document the restoration of my 1964 Shasta 16-SC, and as a journal of the inevitable philosophical and cultural ideas this crazy-ass adventure will provoke.
I hope you enjoy it.

 When last we left, we had taken off most of the exterior screws and some of the windows and trim in preparation for removing the skin. This weekend we finished pulling all trim, windows, and appliances.
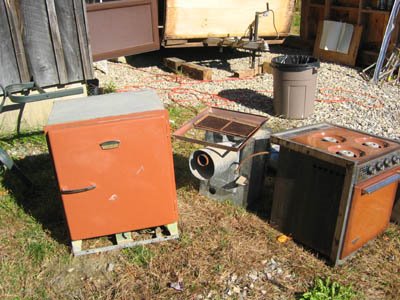

 It is an upholstery tack and staple remover, and it is worth its weight in gold when it comes to pulling rusty flat headed nails out of old aluminum.
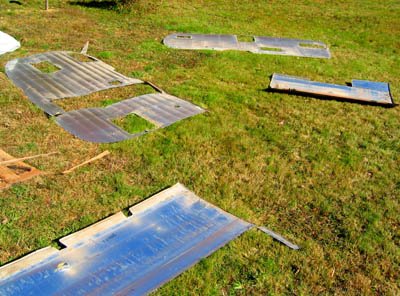 We laid it on the ground wrong side up, and marked all openings, joints, and holes for future reference.
 Although we took off all of the nails holding the roof on, there was no point in actually removing it. We will be reusing it, and it will keep its shape better if it just stays in place. We will still be able to get under there to re-wire and add insulation. The roof joins are "Pittsburg Joints" as opposed to the simple "S-Joints" which are used on the rest of the trailer, and are much easier to separate. I'm pretty sure they joined the roof panels together and then put the entire roof on in one piece during original assembly.
 This weekend's activities brought out a full complement of family inspectors, helpers, and philosophers who took full advantage of the beautiful holiday weekend.